How to Install BoatDek Premium Marine Flooring
Proper installation is crucial for a long-lasting and professional-looking finish. This section covers essential steps, including surface preparation, template creation, and application techniques. You'll also find valuable insights into choosing the right installation method for your specific needs.
Before you begin installation, it’s important to properly prepare to ensure a successful application and long-lasting results.
Getting Started
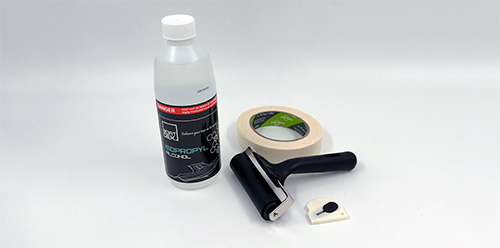
Tools You Will Need
• New Stanley knife
• Clean rags
• Masking tape
• Roller
• Isopropyl alcohol
Floor Preparation
Ensure the boat's floors are completely dry and free from grease. For the best results, we recommend washing the floors the day before installation and keeping them covered until you're ready to install the kit. Before starting, gather the following tools: your Boat Dek Install Kit, rags, tape measure, and a straight edge. Avoid installing the kit in temperatures below 12°C, ensure there is no residual moisture on the deck surface, and steer clear of installing Boat Dek on a hot surface or in direct sunlight during a summer day to minimize the risk of bubbles forming and the product stretching during the install process.
Step One
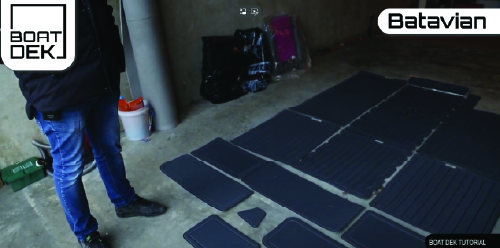
Layout of Pieces
Your Boat Dek kit includes a printed PDF that shows the layout of the kit and the individually numbered pieces. Lay out all the pieces before installing to ensure proper placement and spacing.
Step Two

Prep the Area
Wipe down the entire deck with isopropyl alcohol, ensuring the boat floors are completely dry and free from grease.
Step Three
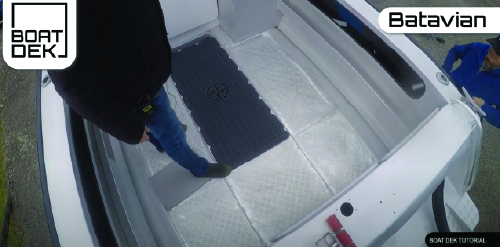
Begin Installation
In most cases, start the installation process from the middle of the deck and work outward. This will help you achieve the correct panel spacing.
Step Four
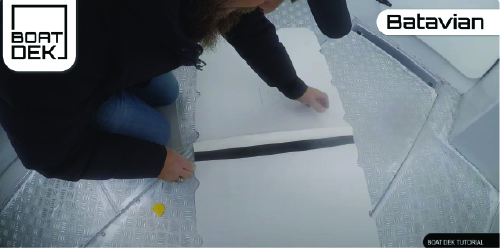
Prepare Each Panel
To install each panel, carefully cut across the backing paper without cutting through the Boat Dek itself. Fold back both sides of the backing paper to expose the adhesive, then place the panel in position and press down in the middle to adhere it to the deck.
Step Five
Align and Secure the First Piece
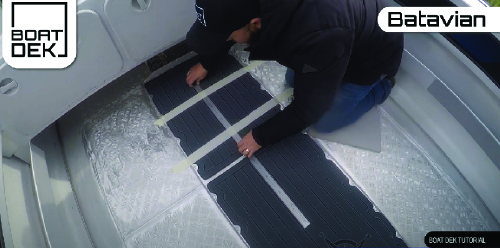
Align the first piece and hold it in place. If the piece is large, use masking tape to temporarily secure it. It’s helpful to have the next piece with you while aligning to ensure proper placement. Once aligned and taped down, lift one side halfway back and begin peeling off the backing paper from the cut made earlier. Slowly roll the piece into place, taking care not to tug or distort its shape.
Step Six

Adhere and Smooth Out the Panel
Boat Dek premium PSA (Pressure Sensitive Adhesive) requires pressure for strong adhesion and eliminating air bubbles. As you lay down the Boat Dek foam panel, allow it to roll onto the floor instead of placing it all at once to avoid trapping air. Use your hands to apply pressure from the centre to the edges, achieving a tack bond. Then use a roller with more pressure but avoid pressing too hard as it may stretch the material. Roll from the middle outward. If air bubbles appear, use a pin to release air, then roll again for a smooth finish
paying special attention to the edges.
Final Step
Complete the Installation
Repeat the process for the remaining areas, ensuring proper alignment of each piece before adhering them.
Download our installation guide PDF
